You’ve perfected your design, but the quote is double what you budgeted. What went wrong? Often, the problem isn’t your idea, but small details driving up the single biggest CNC machining cost: machine time. The longer a machine spends cutting your part, the more you pay.
Tip 1: Choose a Material with Good Machinability To Reduce Your CNC Machining Cost
The simplest way to reduce that time is by choosing a material with good “machinability”—or how easily it can be cut. Think of cutting soft aluminium versus hard steel. In practice, a steel part can be 3-4 times more expensive than an identical one in Aluminium 6061, purely from the extra time required.
Tip 2: Loosen Up: Why Tight Tolerances Are So Expensive
One of the most hidden cost drivers in a CNC machining cost is “tolerance.” Think of this as the acceptable “wiggle room” for a specific measurement. A dimension of 0.5″ with a tolerance of ±0.005 inches means the final part can be anywhere from 0.495″ to 0.505″ and still be considered perfect.
Shrinking that wiggle room to ±0.001 inches doesn’t just cost a little more—it can easily double the price of your part. Achieving such high precision forces the machine to slow way down, take multiple light passes, and often requires special inspection tools. It’s the difference between a quick, confident cut and performing careful surgery.
To slash your CNC machining costs, apply tight tolerances only where it is absolutely critical—like on surfaces that must fit perfectly with another part. For all non-critical features, simply specify the machine shop’s “standard tolerance.” This change signals cost-efficiency and gives the machinist the flexibility to produce your part much faster.
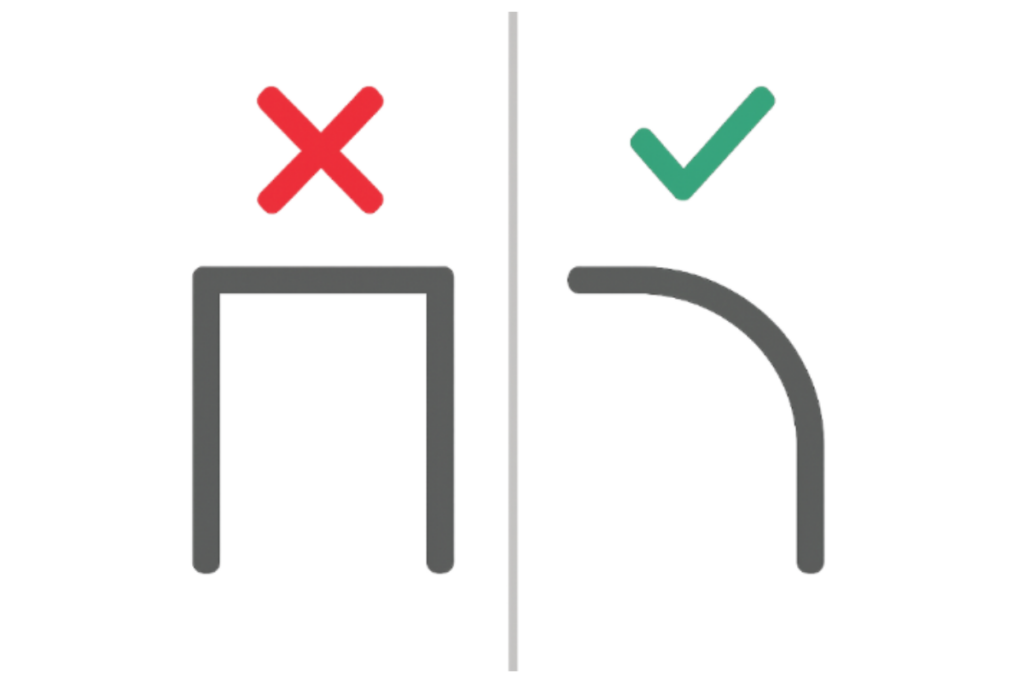
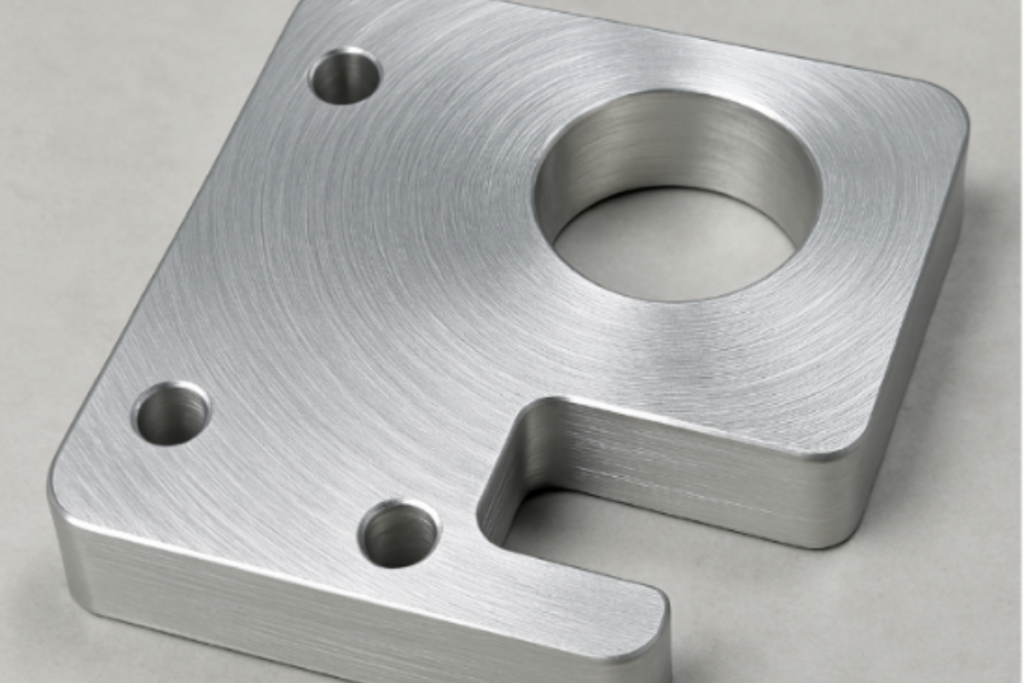
Tip 3: Round Your Internal Corners to Match the Tool
A key to streamlining CAD models for manufacturing is remembering that CNC machines use spinning, round cutting tools. Just like you can’t clean a square pan corner with a round brush, a round tool physically cannot create a sharp 90-degree internal pocket. Forcing the machine to try requires tiny, fragile tools and dramatically slows the process down, driving up your cost.
The solution is simple: design a curve, or ‘internal radius,’ into these corners. A generous radius is always cheaper, letting the machine use a stronger, faster tool. This is an easy way to lower costs without compromising function.
Tip 4: Avoid Thin Walls and Deep, Narrow Pockets
It’s tempting to design sleek parts with minimal material, but this often backfires during machining. In metal, walls under 0.05 inches tend to vibrate during cutting, forcing the machine to slow down dramatically to maintain accuracy. This extra machine time directly increases your final price, so thickening them up where possible is an easy win.
Likewise, deep and narrow pockets force the use of long, fragile cutting tools that must move slowly to avoid breaking. As a rule, costs rise significantly when a pocket’s depth exceeds four times its width. Aim for wider, shallower pockets wherever your function allows.
Tip 5: Keep Holes Simple with Standard Sizes and Depths
Just like you’d use standard screw sizes from a hardware store, using standard drill sizes for your holes is key to lowering costs. Specifying a custom diameter, can require a special tool and adds unnecessary expense. Similarly, adding threads is an extra manufacturing step, so only include them where they are essential.
For even more savings, make your holes go all the way through the part whenever possible. These “through-holes” are faster for a machine to create than “blind holes” that stop partway, making your parts significantly cheaper.
Tip 6: Design for Fewer “Setups” by Grouping Features
Imagine carving a pumpkin. Every time you need to turn it to work on a new side, it’s an extra, time-consuming step. In CNC machining, each time a part must be unclamped, flipped, and precisely re-aligned, it’s called a ‘setup.’ This manual process adds significant labor costs and time to your order.
To save money, design your part for the fewest setups possible. By grouping all machined features—like holes, pockets, and text—onto a single face, you create a part that can be made from one direction. This is the cheapest approach, as it minimizes manual handling by the machinist.
Tip 7: Save Money by Sticking to the Standard “As-Machined” Finish
What happens after the machine stops cutting can also drive up CNC machining cost. Any special surface treatment—like bead blasting, polishing, or anodizing—is a separate post-processing step. These cosmetic options are priced individually and can add significant cost, especially for prototypes where looks aren’t the top priority.
For maximum savings, simply select the standard “as-machined” finish. This clean, functional surface will have fine, visible lines from the cutting tool but is the most affordable option by far. Unless your part absolutely requires a specific look for a final product, sticking with the default is a guaranteed way to avoid extra fees to your CNC machining cost.
Tip 8: Eliminate Small, Engraved Text and Logos
Adding small, engraved text seems simple, but it’s a detail that can be surprisingly expensive. To cut tiny letters, the machine must switch to a fragile tool and move incredibly slowly. This single feature can dramatically increase machine time—often taking longer than cutting the major features of your entire part.
For a truly cost-effective design, remove all engraved text from your CAD model before getting a quote. You can always add logos or serial numbers later using cheaper methods, like printing or decals, after the part is made.
Tip 9: Order in Batches to Lower Your Per-Part CNC Machining Cost
Making a single custom part is always the most expensive option. Think of it like baking: the effort of preheating the oven and preparing the ingredients is the same whether you bake one cookie or a dozen. This initial work is the “setup cost.” In machining, this includes programming the machine and securing the material, making the very first part disproportionately expensive.
Because that setup cost is fixed, ordering more parts at once dramatically lowers the price for each individual one. The cost of making the second, third, and tenth part is only the material and machine time—not another setup fee. If you anticipate needing more in the future, always get quotes for multiple quantities (e.g., 1, 5, 20) to see how quickly the per-part cost drops.
Your Checklist for a Cheaper, Smarter CNC Machining Quote
Getting a CNC machining quote doesn’t have to feel like a lottery. You can now spot the hidden cost drivers yourself, transforming your approach from hopeful to strategic. By applying these tips, you become an informed partner in the manufacturing process, with the control to ensure your vision is realized efficiently and affordably.
Before submitting your next design, run through this quick pre-flight check:
- Can I use a more machinable material?
- Have I relaxed all non-critical tolerances?
- Are all my internal corners rounded?
- Can the entire part be machined from one side?
Are you currently working on a specific design that you’re looking to prototype, or are you just exploring how the manufacturing workflow functions? Contact us to discuss further